zed.0xff.me
grub2 simple hardware boot switch
1. take any old unused USB stick (any size, 16M is more than enough, mine was 128M)
#fdisk -l /dev/sdc
Disk /dev/sdc: 126 MB, 126353408 bytes
16 heads, 32 sectors/track, 482 cylinders, total 246784 sectors
Units = sectors of 1 * 512 = 512 bytes
Sector size (logical/physical): 512 bytes / 512 bytes
I/O size (minimum/optimal): 512 bytes / 512 bytes
Disk identifier: 0x59d30b2a

   Device Boot      Start         End      Blocks   Id  System
/dev/sdc1   *          32      246271      123120   83  Linux
2. [optional] format it to ext2
3. find out its UUID
#blkid /dev/sdc*
/dev/sdc1: UUID="3a5ef90f-0640-42c3-97c2-8743c822ba60" TYPE="ext2"
4. do some simple grub2 scripting:
menuentry "auto" {
        set foo_uuid=3a5ef90f-0640-42c3-97c2-8743c822ba60
        set foo=empty

        insmod part_gpt
        insmod ext2
        insmod search_fs_uuid

        search --fs-uuid --no-floppy --set=foo $foo_uuid

        if [ $foo = "empty" ]; then
                # boot windows
                insmod fat
                insmod chain
                search --fs-uuid --no-floppy --set=root B0D7-DA71
                chainloader (${root})/efi/Microsoft/Boot/bootmgfw.efi
        else
                # boot linux
                set root='(hd0,gpt1)'
                search --no-floppy --fs-uuid --set=root 22c0603d-670e-4097-83d2-539b520fc75a
                linux /boot/vmlinuz root=/dev/sda1
        fi
}
So, if this (and exactly this, with unique UUID) USB stick is plugged in while computer boots – it will boot Linux, otherwise Windows will boot.
Setting up a scan server on OpenWrt & NetGear WNDR3700
1. Install OpenWrt trunk for ar71xx
Follow openwrt wiki WNDR3700 page for detailed instructions.
I used openwrt-ar71xx-generic-wndr3700-squashfs-factory.img and it worked like a charm. Your firmware image may be different, especially if you have WNDR3700 V2. Read wiki carefully.
Note that trunk build does not have HTTP GUI by default. If you want GUI you have to login with telnet and do:
1 2 3 4 |
opkg update opkg install luci /etc/init.d/uhttpd start /etc/init.d/uhttpd enable |
Or just don’t use trunk. stable branch has the GUI by default.
As for me, I’m happy with CLI (no GUI at all) because it saves precious kilobytes of internal flash (5Mb total is available for user)
2. Configure your wired/wireless networks.
Use HTTP GUI or CLI, see WNDR3700 page or other pages in OpenWrt wiki
2½. [optional] set up extroot
Or you may exhaust all your router free “disk” space very fast.
Or you may be smart enough to fit everything in your router’s default flash memory.
Or your router may have much more that 5Mb of flash available :)
at this step I used a small 2-port unpowered USB hub with integrated microSD card reader + 256Mb microSD card
3. Connect your USB scanner & install USB support packages
1 2 |
opkg update opkg install kmod-usb2 usbutils kmod-leds-wndr3700-usb |
repeating opkg update is not necessary if you did update before and did not rebooted your device.
Ensure your scanner is visible as USB device (mine is Canon MF4018):
1 2 3 4 |
root@OpenWrt:~# lsusb Bus 001 Device 001: ID 1d6b:0002 Linux Foundation 2.0 root hub Bus 002 Device 001: ID 1d6b:0001 Linux Foundation 1.1 root hub Bus 001 Device 003: ID 04a9:26b4 Canon, Inc. MF4010 series |
4. Install SANE frontends & backends
1 |
opkg install sane-frontends sane-backends |
Ensure your scanner is recognized by SANE:
1 2 3 4 5 6 7 8 9 10 11 12 13 14 15 16 17 18 19 |
root@OpenWrt:~# sane-find-scanner # sane-find-scanner will now attempt to detect your scanner. If the # result is different from what you expected, first make sure your # scanner is powered up and properly connected to your computer. # No SCSI scanners found. If you expected something different, make sure that # you have loaded a kernel SCSI driver for your SCSI adapter. # Also you need support for SCSI Generic (sg) in your operating system. # If using Linux, try "modprobe sg". found USB scanner (vendor=0x04a9 [Canon Inc.], product=0x26b4 [MF4010]) at libusb:001:003 # Your USB scanner was (probably) detected. It may or may not be supported by # SANE. Try scanimage -L and read the backend's manpage. # Not checking for parallel port scanners. # Most Scanners connected to the parallel port or other proprietary ports # can't be detected by this program. |
note that “found USB scanner” string.
Try to scan something:
1 2 3 4 5 6 7 |
root@OpenWrt:~# scanimage P6 # SANE data follows 640 877 255 ***SKIPPING A LOT OF GARBAGE*** |
you should see a lot of garbage (raw scan data) on your screen, it can be interrupted with Ctrl+C.
5. Set up HTTP
1 |
opkg install uhttpd jpeg-tools |
now edit /etc/config/uhttpd, especially necessary if you have GUI installed. As for me, I only commented out listening on port 443.
grab small HTML/JS/CGI code from my openwrt-scan-server github repo (free hint: look for “Downloads” button at right ;)
and put it to /www dir on your router.
Note that current OpenWrt repos do not have ImageMagick tools available, so if you want a nice image resolution + file size info – you have to install imagemagick-jpeg package and use my identify binary (only for ar71xx platform, see at bin/ar71xx/identify in my github repo, put it in /usr/bin on your router)
6. Test
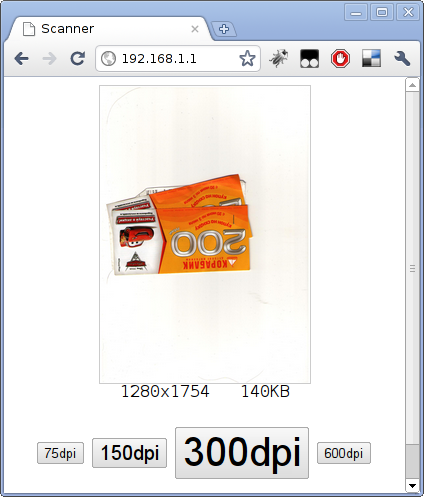
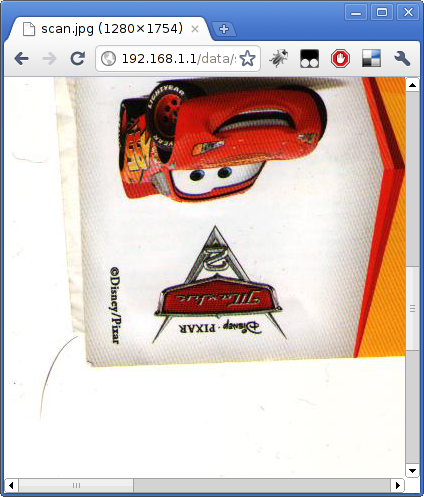
Navigate to your router’s address: http://192.168.1.1 (you may have another one).
You should see something like this:
Installing Gentoo Linux on Sony Vaio VPC-Z13 // Ставим Gentoo линукс на Sony Vaio VPC-Z13
- get the EASEUS Partition Manager Home Edition – it’s free and less than 10M in size
- shrink the windows main NTFS partition from 128G downto 70G (for example)
- create a new 58G partition on free space. type must be Unformatted, I made a Logical partition.
- get the System Rescue CD iso and burn to CD or DVD
- boot the laptop from CD you just burnt (use F2 to enter BIOS setup)
- get Gentoo’s stage3-amd64 and portage-latest archives
1 2 3 4 5 6 7 8 9 10 |
# ls -la /dev/mapper total 0 drwxr-xr-x 2 root root 160 Dec 4 19:12 . drwxr-xr-x 14 root root 3320 Dec 4 16:12 .. crw-rw---- 1 root root 10, 61 Dec 4 19:12 control brw-rw---- 1 root root 253, 0 Dec 4 19:12 isw_bdfiifejbd_Volume0 brw-rw---- 1 root root 253, 2 Dec 4 19:12 isw_bdfiifejbd_Volume01 brw-rw---- 1 root root 253, 3 Dec 4 19:12 isw_bdfiifejbd_Volume02 brw-rw---- 1 root root 253, 4 Dec 4 19:12 isw_bdfiifejbd_Volume03 brw-rw---- 1 root root 253, 5 Dec 4 19:12 isw_bdfiifejbd_Volume05 |
Volume0 is a whole Vaio’s RAID drive (128G)
Volume01 is a some kind of recovery partition (8G)
Volume02 is a Win7 boot partition (100M)
Volume03 is a 70G C: (NTFS)
Volume05 is a unformatted 58G partition – Gentoo will live here
TBC
An error occurred during a connection to light.webmoney.ru
Нашел решение проблемы когда фаерфокс не может подконнектиться к light.webmoney.ru с сабжевой ошибкой – тут.
Вкратце:
1 |
NSS_SSL_ENABLE_RENEGOTIATION=1 /usr/bin/firefox |
Возможно снижение безопасности SSL.
как установить ДубльГис на Gentoo
1 2 3 4 5 |
emerge -tva layman autounmask echo "source /usr/local/portage/layman/make.conf" >> /etc/make.conf layman -a sunrise autounmask -n app-misc/2gis-data-2009.12 USE="kur chel ekb" emerge -tva 2gis |
перед последним шагом в USE указать те города, которые хотим ставить.
текущие поддерживаемые:
kur astr barn biysk chel ekb irk kaz kem kras nkuz nnov nsk nvar odes omsk perm sam tim tom ufa
xorg: лечение неповторения клавиш курсора "вниз" и "влево"
1 2 |
xset r 113 xset r 116 |
вставить в любой скрипт запускающийся при старте X-сессии.
например, в ~/.kde4/Autostart/ (локально, per-user)
или в /etc/kde/startup/agent-startup.sh (глобально, per-system)
лечим ConsoleKit и PowerDevil от Introspectable/Introspect
В настройках KDE power management появились такие сообщения:
There are some issues in your configuration. Please check the Capabilities page for more details.
ConsoleKit was not found active on your PC, or PowerDevil cannot contact it. ConsoleKit lets PowerDevil detect whether the current session is active, which is useful if you have more than one user logged into your system at any one time.
А также сообщения в логах вот такого вида:
Oct 26 11:36:30 localhost dbus-daemon: Rejected send message, 1 matched rules; type="method_call", sender=":1.32" (uid=1000 pid=6311 comm="/usr/bin/systemsettings) interface="org.freedesktop.DBus.Introspectable" member="Introspect" error name="(unset)" requested_reply=0 destination="org.freedesktop.ConsoleKit" (uid=0 pid=4771 comm="/usr/sbin/console-kit-daemon))
Лекарство:
1 2 3 4 5 6 7 8 9 10 11 12 |
--- /etc/dbus-1/system.d/ConsoleKit.conf.bk 2009-10-26 11:18:56.000000000 +0500 +++ /etc/dbus-1/system.d/ConsoleKit.conf 2009-10-26 11:36:53.000000000 +0500 @@ -21,6 +21,9 @@ <deny send_destination="org.freedesktop.ConsoleKit" send_interface="org.freedesktop.DBus.Properties" /> + <allow send_destination="org.freedesktop.ConsoleKit" + send_interface="org.freedesktop.DBus.Introspectable"/> + <allow send_interface="org.freedesktop.ConsoleKit.Manager" send_member="Restart"/> <allow send_interface="org.freedesktop.ConsoleKit.Manager" |
текущие проблемы с линуксом на ноуте
i915 KMS включает 16-битный видеорежим. за счет этого только градиенты некрасивые, но фильмы и фотографии показываются без заметных глазу искажений.
fixed with kernel 2.6.30- довольно часто после просыпания сбрасывается KDE-шная сессия. приходится логиниться заново.
- чуть реже, опять же после просыпания, ноут не реагирует на клавиатуру, и как будто залипает ALT. лечится нажатием 32 раза на любую клавишу :)))
- иногда “залипает” клавиатура, и последняя нажатая клавиша повторяется раз 50 и более.. особенно неприятно когда переключаешься на первый virtual desktop, где живет firefox, и получаешь 50 нажатий f1 в firefox-e – т.е. 50 вкладок с попыткой открытия сайта его помощи :-\
но эта проблема проявляется и на десктопе тоже, но реже, потому что он быстрее. грешу на xorg.
PS: ноут ibm x40
как на линуксе запустить файл без +x
1 2 3 4 5 6 7 8 9 10 11 12 |
# ls -la /usr/bin/whoami -rwxr-xr-x 1 root root 30080 2009-04-28 15:29 /usr/bin/whoami # sudo chmod -x /usr/bin/whoami # ls -la /usr/bin/whoami -rw-r--r-- 1 root root 30080 2009-04-28 15:29 /usr/bin/whoami # /usr/bin/whoami zsh: permission denied: /usr/bin/whoami # /lib/ld-linux.so.2 /usr/bin/whoami zed |
PS: не работает на разделах, смонтированных с опцией noexec :(
SRCS16 => dellmgr
Кто бы мог подумать что для управления из-под линукса рейдом Intel / LSI Logic MegaRAID SRCS16 – надо пользоваться не megacli, и не CmdTool2_Linux, а вовсе даже dellmgr..
Gentoo: миграция no-multilib -> multilib
Если при устновке/конфигурации amd64 генты был установлен профиль no-multilib, то официальная документация говорит нам:
bq{background:#ffbbbb}. Warning: Currently you cannot switch from a no-multilib to a multilib-enabled profile, so think over your decision twice before you use the no-multilib profile.
Но при наличии навыка гугления можно нарыть следующую линку: Howto switch to multilib, где описывается следующий грязный хак:
- распаковка “родного” amd64 stage3
- chroot в него
- заворачивание “родных” gcc и glibc в бинарные пакеты
- chroot оттуда :)
- мерж бинарных пакетов в целевую систему
- обновление gcc и glibc до последних/нужных стандартным emerge’м
Чем мы сейчас и займемся :)
Шаг №1. Меняем профиль.
(старый профиль ссылался на ../usr/portage/profiles/default/linux/amd64/2008.0/no-multilib)
1 2 3 |
cd /etc rm make.profile ln -s ../usr/portage/profiles/default/linux/amd64/2008.0/server make.profile |
Шаг №2. Разворачиваем stage3
(не забываем заменить /path/to/ на реальный путь к stage3)
1 2 3 4 5 6 7 8 9 |
mkdir /mnt/gentoo cd /mnt/gentoo tar xvjpf /path/to/stage3-amd64-2008.0.tar.bz2 mount -t proc none /mnt/gentoo/proc mount -o bind /dev /mnt/gentoo/dev mount -o bind /usr/portage /mnt/gentoo/usr/portage cp -r /usr/portage /mnt/gentoo/usr chroot /mnt/gentoo /bin/bash env-update |
(если всё прошло без ошибок – то мы находимся внутри chroot-а свежераспакованного stage3)
Шаг №3. Заворачиваем glibc и gcc в бинарные пакеты
1 2 3 |
quickpkg glibc quickpkg gcc exit |
(если всё прошло без ошибок – то должны создаться пакеты /usr/portage/packages/sys-devel/gcc-4.1.2.tbz2 и /usr/portage/packages/sys-libs/glibc-2.6.1.tbz2)
(версии могут отличаться если stage3 был не 2008.0)
Шаг №4. Ставим gcc и glibc из бинарных пакетов в целевую систему
1 |
emerge -Ktva glibc gcc |
Шаг №5. Обновляем gcc и glibc до свежих
1 |
emerge -tva1 glibc gcc |
Шаг №6. Cleanup
(выполнять только если все предыдущие шаги прошли успешно :)
1 2 3 4 |
umount /mnt/gentoo/proc umount /mnt/gentoo/dev umount /mnt/gentoo/usr/portage rm -rf /mnt/gentoo |
Шаг №7. Profit!! :)
Можем себя поздравить, всё прошло успешно! :) справедливость multilibность восстановлена! :)
PS: перевод “Howto switch to multilib” не дословный! Отражены некоторые вещи, отражающие более современную действительность и (imho) более системный подход.
Linux Distribution Chooser
Обратился тут ко мне бывший одноклассник с вопросом:
- Слушай я конечно понимаю что наверное с виндой больше не работаеш но всетаки. Может посоветуеш какуенибудь прогу для учета трафика на шлюзе?
И так как с виндой я уже действительно не работаю лет 5 – то я ему (конечно не на 100% серьезно :) посоветовал ставить линукс :)
Закономерный вопрос – какой дистр ставить? Первыми на ум для пользователя-новичка приходят Ubuntu + Suse еще недавно сильно хвалили. Решил по этому вопросу спросить гугля. Гугля естественно выдала кучу холиваров поклонников разных дистров. Причем с 2002 по 2008 гг.
Но! но при запросе через “расширенный поиск” и ограничении по дате “за последний месяц”. Стали попадаться довольно адекватные ссылки.
И был таки найден проект Linux Distribution Chooser, который, задавая кучку вопросов по знанию/владению железом/софтом определяет таки какой дистр для человека более подходящ и на какой процент.
Мне лично он определил c 100% достоверностью Slackware, Gentoo, и ArchLinux. Второй из которых я собственно давно и успешно использую и доволен аки слон ;)
Поэтому и был признан сей чузер годным.