zed.0xff.me
Телефонное интервью в Google №1
(на самом деле не первое, а второе, первое было успешно провалено аж 4 года назад, из-за перенервничания)
Итак, сначала девушка-HR мне написала еmail, в котором мы договорились когда она мне позвонит по телефону. (все общение на английском языке конечно)
Потом она позвонила, спросила куда я хочу – в Дублин или Цюрих? Я удивился, ибо про Цюрих не знал ни сном ни духом… Думал только в Дублин зовут.
Еще сказала что у них есть Software Engineers, а есть Systems Engineers, короче техподдержка серверов и сервисов. Спросила меня куда я хочу, я сказал что не уверен. (но видимо мне таки ближе Systems Engineers :))
Потом начались технические вопросы, порядка 20 штук, довольно элементарные, разделенные на разделы:
- админство *nix
- алгоритмы
- структуры данных
Вопросы из разряда “что такое inode”, “сколько бит занимают права владельца файла в UNIX ACL”, “оцените время выполнения qsearch в worst case случае” (на последний я не ответил, ибо во всяких этих ваших N*log(N) не силен чуть более чем никак)
Вобщем на 1 вопрос я не ответил совсем, еще на 1 ответил на 2/3, а на все остальные ответил на 97-110% ;)
HR сказала что передаст мои ответы и резюме дальше по конвейеру и со мной свяжутся..
Дневник бортинженера авиакомпании "B***Y"
(все персонажи вымышлены, все совпадения с реальными личностями случайны)
Иногда пилоты обращаются ко мне
П: А вот если мы повернем сейчас на 17 градусов влево, то у нас крыло не отвалится?
Я: Хорошо что спросили. Отвалится. Давайте сейчас мои ребята выйдут на крыло, суперклеем намажут, а вы потом вправо повернете, и порезче! Кружок на месте сделаем, заодно и крыло подклеим, и повернем куда надо.
П: ОК
Иногда приходят списки пассажиров вот такого вида:
1. Иванов А.А., муж., Москва
2. Сидорова Е.И., жен., С.Петербург
3. Ъорлщхж М.Ф.У., аъы., Альфа-Центавра
4. Макаров И.А., муж., Курган
А на месте пассажира №3 либо пусто, либо обычный человек сидит. :(
Вот такие они, поставщики данных о пассажирах.
Есть у нас и стюардессы, кои обязаны пассажиров успокаивать, всяческие их потребности удовлетворять, а также быть связующим звеном между пассажирами и экипажем.
Пассажиры бывают разные. Один например глянет в иллюминатор, а там крыло отваливаться начинает, или еще какая напасть, так он тихо подзовет стюардессу, покажет пальчиком в окно, стюардесса передаст быстренько экипажу, мои ребята выбегут, подклеят там чегонить изолентой, мебельным степлером подстеплируют и все ОК. Летим дальше. Все довольны. Внимательному пассажиру бесплатный напиток.
А другой, например, увидит что турбина горит, и давай орать благим матом на весь салон. Приходится бедным стюардессам отдуваться, врать что это он не двигатель горит, а это праздничный салют в честь дня рождения второго пилота, ура-ура! И давай хороводы водить! Вобщем, успокоили.
А турбина? Ну погорит и перестанет, чай не последняя, у нас еще 5 штук есть )))
А недавно мы на лету избавились от карбюратора!!! Воткнули вместо него новенький инжектор (взяли подешевке на авторынке, от ВАЗ 21067, 2011 г.в.)
Совсем другие ощущения!
Какого хрена делал карбюратор на самолете… ума не приложу, вот так вот исторически сложилось.
Это я еще молчу о том что когда я пришел на этот самолет, тут турбины вообще крутили специально обученные белки! O_O Воняяяялооооо…. Бо́льшая часть багажного отсека была забита кормом для белок. Они еще и дохли периодически, а другие размножались. Приходилось как-то поддерживать баланс рождаемости-смертности белок, утилизировать их какашки и тельца, следить за тем чтобы они не бегали по салону и не кусали пассажиров…
Вобщем, инжектор – это просто манна небесная!
Туалет в самолете просто класс! Очень просторный (0.5х0.5х1.5м) и многофункциональный (поддерживаются функции PP и KK). Есть один небольшой нюанс. С вероятностью 10% незадачливого пассажира намертво присасывает к той самой дырке(давлением 4.04 psi), а с другой стороны, с вероятностью те же 10% оттуда прямо на пассажира начинает фонтанировать давлением 5.05 psi все его ужасное содержимое…
Но, как отметили 80% пассажиров: “у нас все получилось”, так что не ремонт туалета пока не заморачиваемся.
Подавляющее большинство довольно – значит все у нас хорошо!!
Авиакомпания у нас очень прибыльная. Потому что мы стремимся перевезти всех пассажиров, которые хотят лететь. Поэтому текущим ремонтом и даже усовершенствованием приходится заниматься в прямом смысле “на лету”.
Хорошо что у нас есть команда бесстрашных инженеров-механиков. Но не всегда хорошо что бесстрашных.
Например, инженер по приборам – очень толковый парень. Благодаря ему мы наконец-то можем в реальном времени видеть сколько у нас горючего в баках, заряд аккумуляторов, текущую скорость, и даже выпускать шасси!! (раньше шасси было как у “кукурузника” например)
Так вот, недавно он приделал классную штуку, альтиметр называется. “Теперь мы можем всегда знать нашу высоту полета! А не спрашивать языком жестов пролетающие мимо борта” – подумали мы.
Свежевключенный альтиметр показал высоту что-то около 56млн км над уровнем моря. O_O
– Какого моря?!
– Южного…
– #(*$&^&#$(!!!!!
Так и живем…
Еще есть специалист по тонкой электронике. Может из волоска и батарейки приемник собрать. Телевизионный.
Взялся он как-то радар ремонтировать (что-то слишком много НЛО последнее время стал показывать)
Ремонтировал-ремонтировал. “Готово” – говорит.
Включаем. Работает. НЛО больше нет. Есть ОРТ. На радаре.
facepalm
demangle MSVC, Delphi & C++Builder mangled function names with pure Ruby
Ever wanted to convert @afunc$qxzcupi or ??3@YAXPAX@Z to something more human-readable?
(ofcourse you wanted, and you know about tdump.exe and undname.exe :)
And now you can do it using pure ruby, thanks to unmangler gem:
Unmangling Borland mangled names
1 2 3 4 5 6 7 8 |
require 'unmangler' puts Unmangler.unmangle "@afunc$qxzcupi" puts Unmangler.unmangle "@Forms@TApplication@SetTitle$qqrx17System@AnsiString" # output: # afunc(const signed char, int *) # __fastcall Forms::TApplication::SetTitle(const System::AnsiString) |
Unmangling MSVC mangled names
1 2 3 4 5 6 7 8 |
require 'unmangler' puts Unmangler.unmangle "??3@YAXPAX@Z" puts Unmangler.unmangle "?AFXSetTopLevelFrame@@YAXPAVCFrameWnd@@@Z" # output: # void __cdecl operator delete(void *) # void __cdecl AFXSetTopLevelFrame(class CFrameWnd *) |
And now w/o arguments
1 2 3 4 5 6 7 8 9 |
require 'unmangler' puts Unmangler.unmangle "@Forms@TApplication@SetTitle$qqrx17System@AnsiString", :args => false # outputs "Forms::TApplication::SetTitle" puts Unmangler.unmangle "?AFXSetTopLevelFrame@@YAXPAVCFrameWnd@@@Z", :args => false # outputs "AFXSetTopLevelFrame" |
Links
TBD: GCC support
Advanced Ruby: percent-literals
most used %-literals:
| % | code | result | description |
|---|---|---|---|
%q |
%q(all `quotes` 'are' "ok") |
"all `quotes` 'are' \"ok\"" |
creates String |
%r |
%r(i_am/a/regexp) |
/i_am\/a\/regexp/ |
creates Regexp |
%w |
%w(abc def ghi) |
["abc", "def", "ghi"] |
splits string into Array |
%x |
%x(ls -a /tmp) |
".\n..\nfile1\nfile2\n" |
alias of `cmd` |
highlighted
1 2 3 4 5 6 7 |
%q(all `quotes` 'are' "ok") => "all `quotes` 'are' \"ok\"" %r(i_am/a/regexp) => /i_am\/a\/regexp/ %w(abc def ghi) => ["abc", "def", "ghi"] %x(ls -a /tmp) => ".\n..\nfile1\nfile2\n" |
interpolation
1 2 3 4 5 6 7 8 9 10 11 |
# lowercase 'w': as-is %w'a #{2+2} b' => ["a", "\#{2+2}", "b"] # uppercase 'W': interpolate %W'a #{2+2} b' => ["a", "4", "b"] # lowercase 'q': as-is %q'a #{2+2} b' => "a \#{2+2} b" # uppercase 'Q': interpolate %Q'a #{2+2} b' => "a 4 b" |
other %-literals
1 2 3 4 5 6 7 8 |
# %s: convert to symbol %s'foo' => :foo # %i: convert to array of symbols - not released yet, will be in Ruby 2.0 ? %i'foo bar baz' => [:foo, :bar, :baz] # '%' w/o any letter - alias for %Q %'a #{2+2} b' => "a 4 b" |
Advanced Ruby: break(value) & next(value)
1. break(value)
break accepts a value that supplies the result of the expression it is “breaking” out of:
1 2 3 4 5 |
result = [1, 2, 3].each do |value| break value * 2 if value.even? end p result # prints 4 |
2. next(value)
next accepts an argument that can be used the result of the current block iteration:
1 2 3 4 5 6 7 |
result = [1, 2, 3].map do |value| next value if value.even? value * 2 end p result # prints [2, 2, 6] |
Ruby: fastest way of converting string into array of characters
| time | code | comment |
|---|---|---|
| 0.147 | s.bytes.to_a | most fastest, but returns ASCII codes instead of chars |
| 0.242 | s.chars.to_a | FASTEST |
| 0.257 | Array(s.chars) | |
| 0.265 | a=[]; s.size.times{ |i| a<<s[i] } | |
| 0.268 | a=[]; s.chars.each{ |c| a<<c } | |
| 0.278 | s.bytes.map(&:chr) | |
| 0.513 | s.scan(/./) | |
| 0.775 | s.split(//) | |
| 0.795 | s.split('') | SLOWEST |
first column is time of 100.000 iterations on Core i5 1.7GHz
code: bench-split.rb
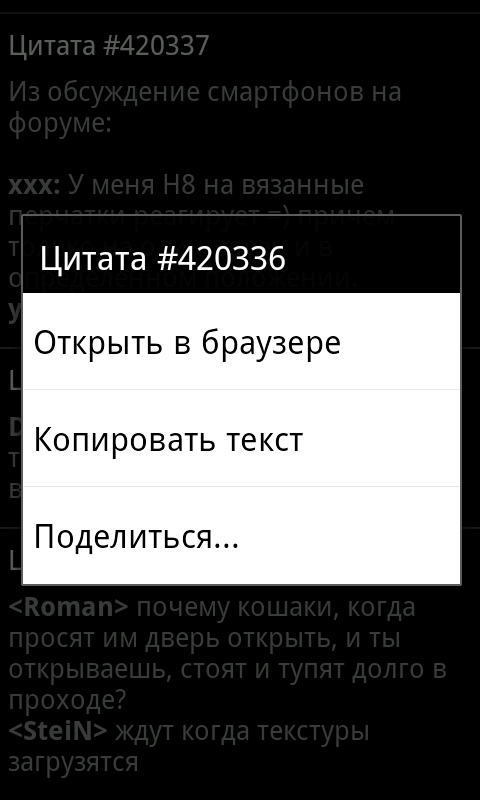
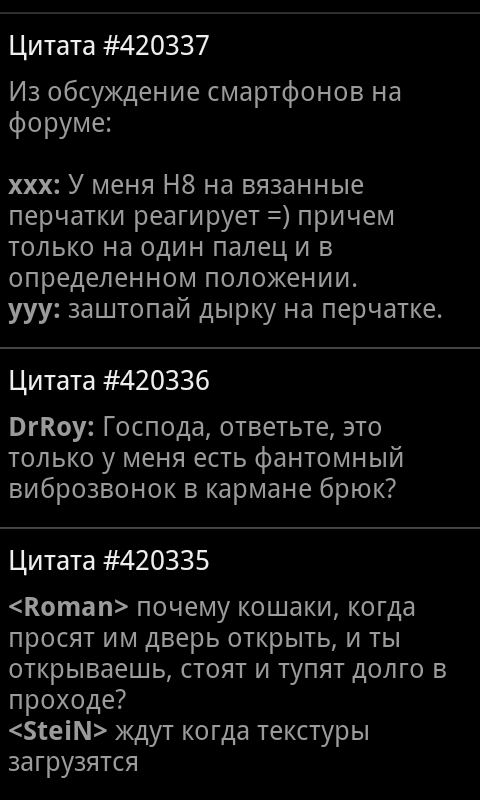
bReader - Читалка цитатников, которая экономит ваше время и трафик

Особенные уникальности:
- Поддержка картинок (xkcd, bash, что-то еще)
- Цитаты обновляются через выделенный сервер обновлений, что:
- гораздо быстрее, чем парсить HTML/XML на устройстве
- экономит трафик, сжимая его и не загружая повторно то, что уже загружено
- ВСЕ цитатники обновляются одним запросом, 2-3 секунды – и у вас уже 200 новых цитат
- Все цитаты образуют единую ленту, но при желании можно читать любой цитатник отдельно.
- Интеграция с твиттером (ну как без него) + все урлы жмутся через bit.ly, так что в один твит влезет больше полезного текста.
- Читалка изначально заряжена 512-ю цитатами, так что даже в глуши без Интернета будет что почитать.
Изначально решил писать свою читалку потому что:
- надоело ждать когда уже одна небезызвестная читалка распарсит все свои источники
- при этом она еще и модальным окном загрузки все закрывает, хотя можно было бы и дать юзеру почитать то что есть, пока новое грузится
- в случае зависания сети/сайта/хз чего – висла вся программа, целиком и полностью
- некоторые цитатники (sramu.net) в RSS и на главной цитаты отдают не целиком, а половинку со ссылкой “читать дальше” – хотелось все-таки такие цитатники тоже читать нормально и без лишних кликов
- ну и комиксы тоже интересно было чтоб были
Немного технических фактов
- итого на написание ушло полгода
- сам читаю цитатники каждый день
- AppStore аналогичное мое приложение отклонил, сволочь
- backend: nginx, ruby, Sinatra, memcached
- хостинг: Amazon EC2 small instance
- IDE: VIM, rake
Все цитатники: (38шт)
| QDB | bash.org (English) |
|---|---|
| bash.altlinux.org | ALT Linux Fortunator |
| bash.org.by | Цитатник Байнета |
| bash.org.ru | Цитатник Рунета |
| bash.org.ru комикс | комиксы по мотивам цитат |
| besit2.ru | если накипело… |
| bezdna.su | Лучшие цитаты из Бездны |
| comicsbook.ru | FFFuuu, trollface, forever alone, okay и другие комиксы. |
| delonevtebe.ru | Дело не в тебе | Неудачные свидания |
| det.org.ru | говорят дети |
| greatwords.ru | Великие слова — цитаты, афоризмы, высказывания |
| hatewall.ru | стена ненависти |
| ibash.org.ru | Новый цитатник Рунета |
| inwebwetrust комикс | Комиксы об Интернете |
| ipfw.ru | Цитатник канала #FreeBSD@RusNET |
| ithappens.ru | Клиент и саппорт. Разработчик и заказчик. Программист и программа. |
| killmepls.ru | Килл Ми Плз: Жизнь. Вид сзади. |
| kstatida.ru | Короткие полезные советы, основанные на личном жизненном опыте, иногда печальном. |
| la2bash.ru | Lineage 2 беседка |
| lorquotes.ru | Latest fortunes from Linux.Org.Ru. |
| nefart.ru | Вот такой не фарт! |
| nextjoke.net | Самые смешные шутки |
| pinator.org | Краткие мотивирующие высказывания |
| pip.ec | Сегодня был ППЦ |
| polniyp.me | Полный П! |
| psyhumor.ru | Психологи шутят |
| shortiki.com | короткие и смешные |
| sramu.net | постыдные истории, рассказанные реальными людьми |
| ukrbash.org | УкрБаш — український цитатник |
| wgbash.org | World of Tanks |
| wumocomicstrip.com | Wumo by Wulff & Morgenthaler – a commentary on life |
| xkcd.com | A webcomic of romance, sarcasm, math, and language. |
| xkcd.ru | xkcd по-русски |
| zadolba.li | задолба!ли |
| жж ellustrator | ЖЖ: Картинки здесь! |
| жж pirozhki-ru | ЖЖ: Пирожковая |
| жж poroshki | ЖЖ: Порошки: кристаллизованная поэзия |
| жж ru-comicstrip | ЖЖ: комиксы на русском |
Скриншотики


Скачать
grub2 simple hardware boot switch
1. take any old unused USB stick (any size, 16M is more than enough, mine was 128M)
#fdisk -l /dev/sdc
Disk /dev/sdc: 126 MB, 126353408 bytes
16 heads, 32 sectors/track, 482 cylinders, total 246784 sectors
Units = sectors of 1 * 512 = 512 bytes
Sector size (logical/physical): 512 bytes / 512 bytes
I/O size (minimum/optimal): 512 bytes / 512 bytes
Disk identifier: 0x59d30b2a

   Device Boot      Start         End      Blocks   Id  System
/dev/sdc1   *          32      246271      123120   83  Linux
2. [optional] format it to ext2
3. find out its UUID
#blkid /dev/sdc*
/dev/sdc1: UUID="3a5ef90f-0640-42c3-97c2-8743c822ba60" TYPE="ext2"
4. do some simple grub2 scripting:
menuentry "auto" {
        set foo_uuid=3a5ef90f-0640-42c3-97c2-8743c822ba60
        set foo=empty

        insmod part_gpt
        insmod ext2
        insmod search_fs_uuid

        search --fs-uuid --no-floppy --set=foo $foo_uuid

        if [ $foo = "empty" ]; then
                # boot windows
                insmod fat
                insmod chain
                search --fs-uuid --no-floppy --set=root B0D7-DA71
                chainloader (${root})/efi/Microsoft/Boot/bootmgfw.efi
        else
                # boot linux
                set root='(hd0,gpt1)'
                search --no-floppy --fs-uuid --set=root 22c0603d-670e-4097-83d2-539b520fc75a
                linux /boot/vmlinuz root=/dev/sda1
        fi
}
So, if this (and exactly this, with unique UUID) USB stick is plugged in while computer boots – it will boot Linux, otherwise Windows will boot.
Dwarf Fortress
Первая цивилизация погибла от (пары) злобных гоблинов.
Вторая тоже =).
Третья научилась строить ДВЕРЬ(!!!) на входе в поселение. Погибла от злобного тролля, который умел ломать двери.
Четвертая погибла от жажды. Потому что все речки и озера зимой замерзли, до подземных источников она докопаться не успела, а как из льда добыть воду не дотумкала.
Пятая сейчас погибает от.. обновления 34.07, после которого дети вдруг стали паниковать по поводу своей одежды (ее отсутствия или поношенности, а новую надевать не хотят) и сходить с ума..
раскодируем Trojan.Siggen3.35000
лечение
обнаружение
Попался мне как-то в руки троянчик.
Вот его анализ на pedump.me
Вот так он обнаруживается различными антивирусами:
| AntiVir: | TR/Offend.6610086.8 |
| BitDefender: | Trojan.Generic.6610086 |
| ClamAV: | Trojan.Dropper-31300 |
| DrWeb: | Trojan.Siggen3.35000 |
| Emsisoft: | Trojan.SuspectCRC!IK |
| F-Secure: | Trojan.Generic.6610086 |
| Fortinet: | W32/Filecoder.AA |
| GData: | Trojan.Generic.6610086 |
| Ikarus: | Trojan.SuspectCRC |
| K7AntiVirus: | Riskware |
| Kaspersky: | UDS:DangerousObject.Multi.Generic |
| McAfee: | Artemis!2A8242105FED |
| NOD32: | Win32/Filecoder.AA |
| Norman: | W32/Malware.WVNX |
| Panda: | Trj/CI.A |
| TheHacker: | Trojan/Filecoder.ab |
полный отчет на virustotal.com
анализ
троян портит JPG, DOC, XLS файлы. Обнаружить испорченные файлы можно визуально по следующему куску данных в конце файла:
1 2 3 4 5 6 7 8 9 10 |
001a2cfb: 34 36 34 36 34 34 33 38 34 36 34 36 34 35 33 31 |4646443846464531| 001a2d0b: 33 32 33 35 34 36 34 36 34 36 34 36 33 30 33 31 |3235464646463031| 001a2d1b: 33 30 33 30 33 30 33 30 33 30 33 30 33 30 33 30 |3030303030303030| 001a2d2b: 33 30 33 30 33 30 33 30 33 30 33 30 33 30 33 30 |3030303030303030| 001a2d3b: 33 30 33 30 33 30 33 30 33 30 33 30 33 30 33 30 |3030303030303030| 001a2d4b: 33 30 33 30 33 30 33 30 33 30 33 30 33 30 33 30 |3030303030303030| 001a2d5b: 33 30 33 30 14 00 00 00 00 fb 2c 1a 00 14 00 04 |3030......,.....| 001a2d6b: 00 00 0f 2d 1a 00 14 00 08 00 00 23 2d 1a 00 14 |...-.......#-...| 001a2d7b: 00 0c 00 00 37 2d 1a 00 14 00 10 00 00 4b 2d 1a |....7-.......K-.| 001a2d8b: 00 05 |
(конкретные данные различны в зависимости от содержимого файла)
результат бинарного сравнения нормального (слева) и испорченного (справа) файла:
1 2 3 4 5 6 7 8 9 10 11 12 13 14 15 16 17 18 19 20 21 22 23 24 25 26 27 28 |
00000000: ff 54 00000001: d8 2f 00000002: ff 54 00000003: e1 38 00000004: 25 7a 00000400: ff 54 00000401: ff 56 00000402: 01 56 00000403: 00 57 00000404: 00 55 00000800: 00 54 00000801: 00 51 00000802: 00 54 00000803: 00 51 00000804: 00 54 00000c00: 00 54 00000c01: 00 51 00000c02: 00 54 00000c03: 00 51 00000c04: 00 54 00001000: 00 54 00001001: 00 51 00001002: 00 54 00001003: 00 51 00001004: 00 54 [!] 168_ok.jpg is 1715451 bytes long [!] 168_bad.jpg is 1715597 bytes long |
фактически троян портит по 5 байт в файле с интервалом в 1024 байта. но не просто портит, а записывает оригинал в конец испорченного файла. вот наглядный вид чего он там понаписал:
1 2 3 4 5 6 |
001a2d5f: 14 00 00 00 00 fb 2c 1a 00 |......,..| 001a2d68: 14 00 04 00 00 0f 2d 1a 00 |......-..| 001a2d71: 14 00 08 00 00 23 2d 1a 00 |.....#-..| 001a2d7a: 14 00 0c 00 00 37 2d 1a 00 |.....7-..| 001a2d83: 14 00 10 00 00 4b 2d 1a 00 |.....K-..| 001a2d8c: 05 |
radare2 0.8.x unnecessary memory zeroing fix
the bug only appears when debugging 32-bit binary on a 64-bit host
1 2 3 4 5 6 7 8 9 10 11 12 13 14 15 16 17 18 19 20 21 22 23 24 25 26 27 28 29 30 31 |
diff -r e96275c214b5 libr/io/p/io_ptrace.c --- a/libr/io/p/io_ptrace.c Mon Oct 24 04:35:42 2011 +0200 +++ b/libr/io/p/io_ptrace.c Mon Oct 24 16:48:31 2011 +0300 @@ -34,9 +34,11 @@ #if __OpenBSD__ || __KFBSD__ #define debug_read_raw(x,y) ptrace(PTRACE_PEEKTEXT, (pid_t)(x), (caddr_t)(y), 0) #define debug_write_raw(x,y,z) ptrace(PTRACE_POKEDATA, (pid_t)(x), (caddr_t)(y), (int)(size_t)(z)) +typedef int ptrace_word; // int ptrace(int request, pid_t pid, caddr_t addr, int data); #else #define debug_read_raw(x,y) ptrace(PTRACE_PEEKTEXT, x, y, 0) #define debug_write_raw(x,y,z) ptrace(PTRACE_POKEDATA, x, y, z) +typedef void* ptrace_word; // long ptrace(enum __ptrace_request request, pid_t pid, void *addr, void *data); #endif static int debug_os_read_at(int pid, ut32 *buf, int sz, ut64 addr) { @@ -63,10 +65,11 @@ } static int ptrace_write_at(int pid, const ut8 *pbuf, int sz, ut64 addr) { - ut32 *buf = (ut32*)pbuf; - ut32 words = sz / sizeof (ut32); - ut32 last = sz % sizeof (ut32); - ut32 x, lr, *at = (ut32*)(size_t)addr; + ptrace_word *buf = (ptrace_word*)pbuf; + ut32 words = sz / sizeof (ptrace_word); + ut32 last = sz % sizeof (ptrace_word); + ut32 x, *at = (ptrace_word*)(size_t)addr; + ptrace_word lr; if (sz<1 || addr==UT64_MAX) return -1; for (x=0; x<words; x++) |
printing from OSX & iOS to Canon MF-4018 shared via WNDR3700
0. Reason for this all

Just bought an HP Photosmart 5510 with wifi & ePrint and my MacBook Air found and installed it via wifi without the need of any drivers or anything.

But I also have older Canon MF4018, connected directly to WNDR3700 via usb, and which I failed to set up for printing from my Macs via wifi.
1. Drivers

The main reason why I failed is Canon’s drivers for MF4018 (or MF4010, their printing functions are the same). They only have more or less usable drivers for Windows and Linux, closed-source and bad designed, with a lot of proprietary stuff.
There is a way to make your OpenWRT router act like a print server for Windows & Linux clients, but it refuses to work with OSX client.
And even if we’ll somehow force it to work with OSX client, it will still need a lot of Canon drivers installed on Mac and carefully configured. And definitely will not work with iOS
2. Workaround
You can use one simple workaround if you have an x86 or x86_64 computer running 24/7 at your place. Or if you want to manually turn it on every time when you need to print something.
You can then install CUPS on your device, or use a Windows Printer Sharing.
Unacceptable for me. I only have WNDR3700 on ar71xx platform, and AppleTV2 on ARM Cortex A8 running nearly 24/7 at my home.
3. An Insight
If I can’t run an x86 PC 24/7 at my place — who or what can stop me to run it somewhere on Internet?!
(I already have a pair of servers on Internet, so let’s increase their load average a little :)
IMPORTANT: You’ll need to have a Real IP address at your place, or some other way of receiving data from your Internet server, like a SSH tunnel.
4. Step-by-step guide
- WNDR3700 (or other OpenWrt-based router, or DD-WRT one, or wl500g)
- Connect MF4018 via usb
- Set up p910nd
- Open port 9100 in firewall:
iptables -A INPUT -j ACCEPT -p tcp -s your.internet.server.real.ip --dport 9100
- Internet server
- install CUPS
- install Canon Proprietary drivers: for example UFRII/UFRII LT Printer Driver for Linux v2.20
- Add a printer:
lpadmin -p mf4010 -P CNCUPSMF4010ZK.ppd -v socket://my.home.real.ip:9100 -o printer-is-shared=true - enable CUPS Internet sharing:
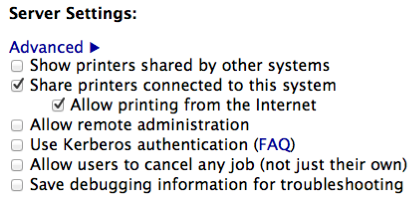
- set up CUPS and/or firewall to only allow connections from YOUR home/office network
- Optional steps, needed only for seamless printer autoconfiguration for OSX/iOS devices
- Configure
- Internet server: use airprint-generate to generate a
.servicefile for your printer - edit generated file: add
<host-name>my.internet.server.real.ip</host-name> - WNDR3700: install
avahi-daemon, feed it with previously generated file, start it
- Internet server: use airprint-generate to generate a
- Now in OSX “Add Printers” Dialog just click “
+” and it should see your printer, iOS should see your printer when you’ll try to print some photo
- Configure
my autogenerated & edited mf4010.service file:
1 2 3 4 5 6 7 8 9 10 11 12 13 14 15 16 17 18 19 20 21 |
<?xml version="1.0"?> <!DOCTYPE service-group SYSTEM "avahi-service.dtd"> <service-group> <name replace-wildcards="yes">Canon MF4018</name> <service> <type>_ipp._tcp</type> <subtype>_universal._sub._ipp._tcp</subtype> <port>631</port> <host-name>my.internet.server.real.ip</host-name> <!-- EDIT THIS --> <txt-record>txtvers=1</txt-record> <txt-record>qtotal=1</txt-record> <txt-record>Transparent=T</txt-record> <txt-record>URF=none</txt-record> <txt-record>rp=printers/mf4010</txt-record> <txt-record>note=laser</txt-record> <txt-record>product=(GPL Ghostscript)</txt-record> <txt-record>printer-state=3</txt-record> <txt-record>printer-type=0x821484</txt-record> <txt-record>pdl=application/octet-stream,application/pdf,application/postscript,image/gif,image/jpeg,image/png,image/tiff,text/html,text/plain,application/vnd.cups-banner,application/vnd.cups-postscript,application/vnd.cups-raw,application/vnd.hp-hpgl,image/x-bitmap</txt-record> </service> </service-group> |
hack.lu 2011 CTF -- Unknown Planet -- writeup
[ Lobotomy ]
0. original image file

1. analyzing image
all JPEGs have special EOF marker FF D9 and no data must be after this marker.
1 2 3 4 5 |
[zed@zmac 200.unknown.planet+]#irb -E binary ruby-1.9.2-p290 :004 > data=File.read '0_8c4f14e28155a2c3cf4b2538c1e0958b.jpg'; data.size => 194420 ruby-1.9.2-p290 :005 > data.split("\xff\xd9").map(&:size) => [192405, 2013] |
so, we can see that there’s 2013 spare bytes after EOF marker.
1 2 3 4 5 6 |
File.open('foo','w'){ |f| f<< data.split("\xff\xd9").last } => #<File:foo (closed)> ruby-1.9.2-p290 :007 > ^D [zed@zmac 200.unknown.planet+]#file foo foo: Zip archive data, at least v2.0 to extract |
AHA! It’s a zip! :)
2. unzipping
1 2 3 4 5 6 7 8 9 10 11 12 13 14 15 16 17 18 19 20 21 22 23 24 25 26 27 28 29 30 31 32 33 34 |
[zed@zmac 200.unknown.planet+]#unzip foo Archive: foo inflating: 5IIUED7GheR inflating: 6JXtwsTTh9k inflating: 87F1s5POUJc inflating: BPiIOASG_Z6 inflating: nLPA8X0UJqf inflating: rySOWi4fZkA inflating: uvlSlG3Tgow inflating: Uw105aD3qYh inflating: Yui5oq58hlx [zed@zmac 200.unknown.planet+]#ls -la -rw-r--r--@ 1 zed staff 20000 Apr 25 16:45 5IIUED7GheR -rw-r--r--@ 1 zed staff 20000 Apr 25 16:45 6JXtwsTTh9k -rw-r--r--@ 1 zed staff 20000 Apr 25 16:45 87F1s5POUJc -rw-r--r--@ 1 zed staff 20000 Apr 25 16:45 BPiIOASG_Z6 -rw-r--r--@ 1 zed staff 20000 Apr 25 16:45 Uw105aD3qYh -rw-r--r--@ 1 zed staff 20000 Apr 25 16:45 Yui5oq58hlx -rw-r--r--@ 1 zed staff 1324 Apr 25 16:45 nLPA8X0UJqf -rw-r--r--@ 1 zed staff 20000 Apr 25 16:45 rySOWi4fZkA -rw-r--r--@ 1 zed staff 20000 Apr 25 16:45 uvlSlG3Tgow [zed@zmac 200.unknown.planet+]#file * 5IIUED7GheR: data 6JXtwsTTh9k: data 87F1s5POUJc: 8086 relocatable (Microsoft) BPiIOASG_Z6: data Uw105aD3qYh: data Yui5oq58hlx: data nLPA8X0UJqf: 8086 relocatable (Microsoft) rySOWi4fZkA: data uvlSlG3Tgow: RIFF (little-endian) data, WAVE audio, Microsoft PCM, 8 bit, mono 8000 Hz |
Looks like audio file, that was split in chunks of 20000 bytes each.
uvlSlG3Tgow is a first chunk b/c it has a RIFF WAVE header.
nLPA8X0UJqf is a last tail chunk b/c it’s size less than 20000.
3. gluing waves
importing files in Audacity (or any other sound editor) discovers that source file is supposed to be a Morse – coded message. But we must find a correct order of chunks.
So, morse code consists of dots and dashes. Each kind must have fixed length.
We suppose that source file was generated programmatically, not recorder from line or mic. So, it’s timings must be perfect.
Following tool helps to manually find a correct chunks order.
1 2 3 4 5 6 7 8 9 10 11 12 13 14 15 16 17 18 19 20 21 22 23 24 25 26 27 28 29 30 31 32 33 34 35 |
#!/usr/bin/env ruby STDOUT.sync = true if ARGV.size == 0 raise "gimme at least one chunk filename" end b0 = "\x80"*8 b1 = "\x27\x01\x27\x80\xd9\xff\xd9\x80" data = ARGV.map{ |x| File.read(x) }.join.force_encoding('binary') if data[0,4] == 'RIFF' data = data[44..-1] end N=120 b0 = b0*N b1 = b1*N r = '' 0.step(data.size-1,b0.size) do |i| case (d=data[i,b0.size]) when b0 print "." r << '0' when b1 print "#" r << '1' else raise "SYNC ERROR" if d.size == b0.size raise "NOT ENOUGH DATA #{d.size}/#{b0.size}" raise "unknown #{d.size} (normal: #{b0.size}) bytes of data #{d.split('').map{|x| "%02x " % x.ord}.join}" end end |
calling with a single chunk – script says that it needs more data (more chunks):
1 2 |
[zed@zmac 1]#./2_manually_guess_chunk_order.rb uvlSlG3Tgow ##..######..######.../2_manually_guess_chunk_order.rb:32:in `block in <main>': NOT ENOUGH DATA 756/960 |
calling with wrong 2nd chunk => SYNC ERROR:
1 2 |
[zed@zmac 1]#./2_manually_guess_chunk_order.rb uvlSlG3Tgow 6JXtwsTTh9k ##..######..######..###./2_manually_guess_chunk_order.rb:31:in `block in <main>': SYNC ERROR |
two chunks in correct order, script says it needs more chunks:
1 2 |
[zed@zmac 1]#./2_manually_guess_chunk_order.rb uvlSlG3Tgow 5IIUED7GheR ##..######..######..##......##..##..##..#./2_manually_guess_chunk_order.rb:32:in `block in <main>': NOT ENOUGH DATA 596/960 |
all chunks in correct order:
1 2 |
[zed@zmac 1]#./2_manually_guess_chunk_order.rb uvlSlG3Tgow 5IIUED7GheR rySOWi4fZkA 87F1s5POUJc 6JXtwsTTh9k Uw105aD3qYh BPiIOASG_Z6 Yui5oq58hlx nLPA8X0UJqf ##..######..######..##......##..##..##..##......##......##..##......######..##..######......######..##..######..######......######..######..######......##..##..##...... |
4. decoding Morse
we’ll need a ruby morse gem. install it with “gem install morse”
1 2 3 4 5 6 |
[zed@zmac 200.unknown.planet+]#irb ruby-1.9.2-p290 :001 > r='##..######..######..##......##..##..##..##......##......##..##......######..##..######......######..##..######..######......######..######..######......##..##..##......' ruby-1.9.2-p290 :002 > require 'morse' => true ruby-1.9.2-p290 :005 > puts Morse.decode(r.gsub('......'," ").gsub('######','-').gsub('.','').gsub('##','.')) PHEIKYOS |
Voila! “Pheikyos” is the answer. Case-sensitive.
PS: all source & data files are available at my ctf github repo.
iphone glossy buttons howto
sample images
| one big sample image | 33 individual button images |

|
|


ObjC code
Following ObjC code uses iphone Private API (UIGlassButton class), so it may be rejected from AppStore.
BUT you can generate a lot of iphone-style glossy button images with it, save to PNG, and use in your projects.
IMPORTANT: this code must be run on iPhone simulator. it saves PNG images to /tmp folder on your computer
1 2 3 4 5 6 7 8 9 10 11 12 13 14 15 16 17 18 19 20 21 22 23 24 25 26 27 |
#define UIColorFromRGBA(rgbValue,a) [UIColor colorWithRed:((float)((rgbValue & 0xFF0000) >> 16))/255.0 \ green:((float)((rgbValue & 0xFF00) >> 8))/255.0 \ blue:((float)(rgbValue & 0xFF))/255.0 alpha:a] Class theClass = NSClassFromString(@"UIGlassButton"); for(int j=0;j<3;j++){ for(int i=0;i<=10;i++){ UIButton *theButton = [[[theClass alloc] initWithFrame:CGRectMake(5+120*j, 5+i*44, 120, 44)] autorelease]; [theButton setValue:UIColorFromRGBA(0xff<<(j*8),0.1*i) forKey:@"tintColor"]; //[theButton setTitle:@"Accept" forState:UIControlStateNormal]; [self.view addSubview:theButton]; UIGraphicsBeginImageContext(theButton.frame.size); CGContextRef theContext = UIGraphicsGetCurrentContext(); [theButton.layer renderInContext:theContext]; UIImage *theImage = UIGraphicsGetImageFromCurrentImageContext(); NSData *theData = UIImagePNGRepresentation(theImage); [theData writeToFile:[NSString stringWithFormat: @"/tmp/btn%@%02i.png", j==0 ? @"B" : (j==1 ? @"G" : @"R"), i] atomically:NO]; UIGraphicsEndImageContext(); } } |
and now make them stretch
automatically stretching  to
to 
(oops, button lost a shadow during screen capture, not important here though)
note that stretchableImageWithLeftCapWidth method:
1 2 3 4 |
            UIButton* button = [[UIButton alloc] init];
            [button setTitle:@"  looong long long very long text  " forState:UIControlStateNormal];
            [button setBackgroundImage:[[UIImage imageNamed:@"btnB10.png"] stretchableImageWithLeftCapWidth:10 topCapHeight:10] forState:UIControlStateNormal];
            [button sizeToFit];
|
NB: Don’t forget to release a button ! :)
Наноисследование твиттера :)
1. Очевидный факт – минимальная длина юзернейма в твиттере = 1 символ
примеры: @a @b @0
естественно, на данный момент они уже все давно заняты :)
2. Не всякий @lol это LOL и не всякий @nike это Nike
примеры:
| @nike | 1K followers | 0 tweets | ни разу не найк |
| @adidas | 4K followers | 170 tweets | вроде как адидас |
| @puma | 21K followers | 1200 tweets | аутентичная пума |
| @sela | 46 followers | 4 tweets | какой-то мужик |
| @mcdonalds | 163K followers | 5500 tweets | аутентичный макдак |
| @lol | 800 followers | 41 tweets | совсем не смешно |
| @humor | 1200 followers | 13 tweets | аналогично |
| @yandex | 65K followers | 800 tweets | аутентичный яндекс |
| 3.5M followers | 2800 tweets | аутентичный гугл | |
| @apple | 2K followers | 2 tweets | не эппл ни разу |
Вывод №1: популярный юзернейм вроде @apple или @humor может принести пару тысяч лишних фолловеров
Вывод №2: что следует сделать твиттеру
Твиттеру следует сделать возможность покупки уже существующих имен. Не принудительной естественно. Просто при заходе в чужой профиль кнопочка “I want to buy this username” и как на ебее – ставки, минимальная цена, аукцион (опционально) и т.п.
А может и сам владелец профиля у себя в настройках выставлять “I would sell this username for at least $5000”.
Соответственно если кто-то на эту кнопочку нажал, и сумму указал, он подтверждает что он не просто так нажал, а этим взял на себя обязательство в случае согласия владельца юзернейма купить его (юзернейм, а не владельца :) за указанную сумму.